The Basic View
When you click on a device, we will read all sorts of data from the device (depending on the vendor driver!). This can take a while; on stacked devices we have seen this take 30-45 seconds for a 5 or 6 member stack. Please be patient!
Once data has been retrieved, the basic view will open up, with the following elements.
Top Menu Banner

The banner bar shows the device name on the left. This may be preceded by one or more icons (configurable by the admin), which would be links to external systems with more information about the device. E.g. you may see a link to the Network Management System.
The entry in the center,  , will get you a real-time read of the ethernet
tables (MAC address) and LLPD neighbors of the device. If the device is a router, ARP entries for IPv4 will also be shown.
, will get you a real-time read of the ethernet
tables (MAC address) and LLPD neighbors of the device. If the device is a router, ARP entries for IPv4 will also be shown.
On the right,  , does exactly that! This forces a complete refresh of all device data.
 If you have made changes that require saving the config, an additional option to save the config
will appear on the right with a warning icon in front! Click it to save the running config to the device startup config.
(I.e. this is a ‘write mem’!) When completed, that option will disappear.
If you have made changes that require saving the config, an additional option to save the config
will appear on the right with a warning icon in front! Click it to save the running config to the device startup config.
(I.e. this is a ‘write mem’!) When completed, that option will disappear.
The Tabs

Below the bar are the tabs. The default tab is the Interfaces tab, containing the visible interfaces on the device. If you have the ability to manage any of the interfaces, they will be listed with the proper forms to allow changing the configuration.
Additionally, you will see tabs with device Information, and OpenL2M Activity logs for this device. If configured, there may even be a tab for Commands.
Interfaces Tab

In the Interfaces tab, the following fields are shown:
Name
If the interface is enabled, the name will show on a green background. If Link is UP, it will be brighter green, if link is DOWN, a somewhat lighter green color. If the interface is disabled, the background will be red! (Note these are the default colors. They are admin-configurable, so your mileage may vary!)
Note that the interface name can be preceded by one or more images. If so, these are links to external systems, such as your Network Management System. This is configured by the admin.
Interface names may have icons behind them. They indicate various features.
The possible interface icons are:
This means the interface is in trunking or 802.1Q tagged mode. Hovering over the icon will show the tagged Vlans on this port. Clicking this will show the Edit Vlan Tags form, if user has permissions.
Note: this functionality needs to be enabled in the “configuration.py” file. It requires a restart of the OpenL2M service.
This means the interface is in access mode, and the user has permissions to edit 802.1q tags. Clicking this will show the Edit Vlan Tags form.
This means the interface is an LACP bridge-aggregate interface, or a member of an LACP aggregation interface. Hovering over the icon will either show the member interfaces for a virtual aggregate interface, or for a physical interface the bridge aggregate it is part of.
This means the interface has a voice vlan defined on it. This is Cisco specific. Hovering over the icon will show the Voice Vlan.
This means the interface is in routed mode (i.e. layer 3). Routed Mode interfaces can not be managed.
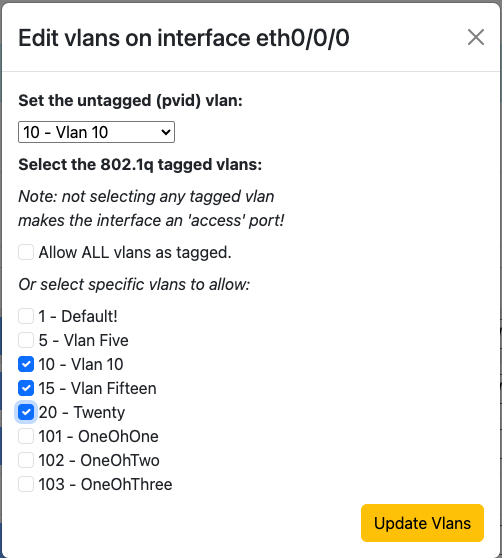
Editing the untagged and 802.1q tagged vlans of an interface
If enabled by the OpenL2M administrator, and your current device (switch) is supported, Admins can edit untagged and 802.1q-tagged vlans on interfaces. Select the untagged (aka ‘pvid’) vlan, and select either All vlans (if supported), or individual vlans that will be allowed through 802.1q ‘trunk’ encapsulation. Click ‘Update Vlans’ to submit.
Note that not selecting tagged vlans will set the interface to so-called ‘access’ untagged mode.
Enabling or Disabling the Interface

If you want to Disable a currently enabled interface, click on the interface name on the left side. In the warning box, select OK. To enable a disabled port, do the same!
Link
If the interface is enabled, and link established, this will show the link speed in Mbps. A dash indicates no link.
Vlan
The current ‘PVID’ or ‘untagged’ vlan of the port will be shown.
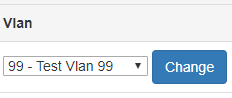
Click the drop-down arrow next to the current untagged vlan, and select the new untagged vlan. You will only see vlans you are allowed to change to. Click the ‘Change’ button to apply the new untagged vlan. Note this may take a little while, so please be patient.
In some cases, the interface is on a VLAN that is not defined on the device (due to backend configurations; this should not happen in properly configured devices!) In that case, this will show as “<vlan id> - Not Defined”
PoE
If Power-over-Ethernet is enabled on capable devices, the interface PoE status will be indicated in this field. The power drawn will also be listed, If we can read it from the device. An example of the PoE display of enabled port serving about 9 Watts of power is:

Here are the meanings of the various icons used in the PoE section:
 This means PoE is enabled, but not serving power.
 This means PoE is serving power. Depending on vendor, we can also show
the power consumed by the device on this port.
This means PoE is serving power. Depending on vendor, we can also show
the power consumed by the device on this port.
 This means PoE is enabled, and there is a fault on the port.
 This means PoE is disabled on this port.
To change state, simply click on the Disabled or Enabled icon to change the power state of the port.
 Click this icon to toggle the power off,
and then on again after a short wait (5 seconds by default, but admin configurable)
Note this only shows for port with power enabled.
Click this icon to toggle the power off,
and then on again after a short wait (5 seconds by default, but admin configurable)
Note this only shows for port with power enabled.
Description
This is the current interface description. If you are allowed to change the description, type in the new text, and hit ‘Change’.
Commands
If defined by the admin, there will be a list of ‘show’ commands you can issue for this interface.
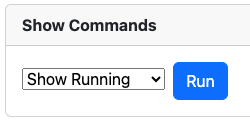 Select the command, and click on ‘Run Command’. Be patient, and the page will refresh will all current data,
but with a new active ‘Command Output’ tab showing the results of the command. Continue navigating as usual.
Select the command, and click on ‘Run Command’. Be patient, and the page will refresh will all current data,
but with a new active ‘Command Output’ tab showing the results of the command. Continue navigating as usual.
Bulk Edit Tab

If permissions allow, users will see the Bulk Edit tab. This shows the Bulk Edit form. This form allows you to apply a variety of changes at once to several interfaces.
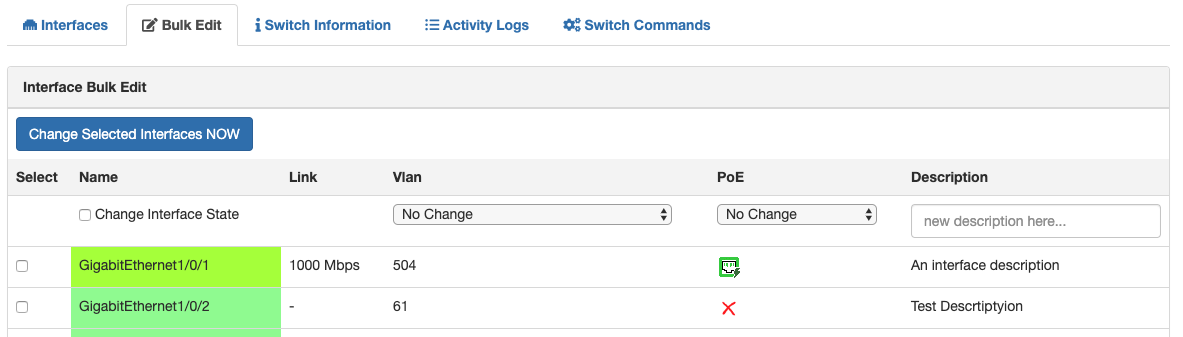
You can toggle the interface up/down state (a admin-down interface will be brought up, and vice versa, an up interface will go admin-down, all at once!)
You can change the interface (untagged) vlan
You can change or append to the interface description.
You can choose to either change the PoE state (PoE Enabled to Disabled, and PoE Disabled to Enabled), or on interfaces with power enabled, ‘toggle’ power down, and back up (with an admin configurable wait time) Note this is done serially, so if you perform this on many interfaces at once, it will take some time! Please be patient!
Fill in the form, then select the interfaces you want to apply this to.
To apply the change now, click the “Update Selected Interfaces NOW” button, and your changes will be applied. Please be patient!
Device Information Tab
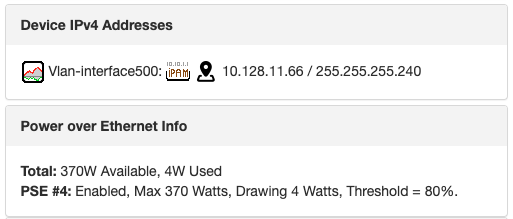
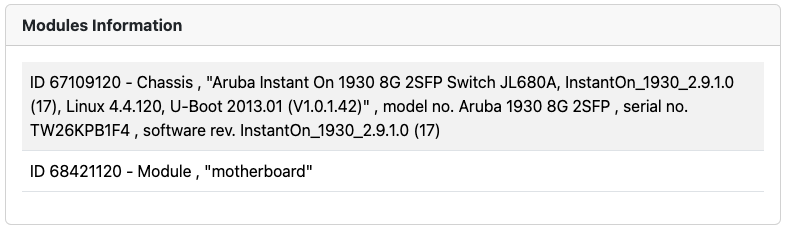
This shows a series of information about the device. Depending on the device and what is supported in the driver, this can include items such as model, firmware,serial numbers, vlans defined on device, PoE power supply info, stacking info, IP(v4) addresses of the device, and more.
E.g.:
On properly configured Cisco devicees (see Faq), we can show recent log entries:

Activity Logs Tab
This will show recent OpenL2M activity on this device. I.e. recent changes using OpenL2M will be listed here by user and time.
This does not show configuration changes applied through other methods, not does this show device logs! (You could, however, create a command that shows the last N log entries.)
Note that admins have full OpenL2M activity log access, as documented elsewhere.
Commands Tab

This tab will only show if ‘global’ device-level commands are configured by the admin.
This tab will give a simple form with some ‘global’ show commands you can execute on the device. Select a command, click on ‘Run Command’, and be patient!
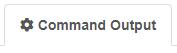
When complete, the page will refresh and a new ‘Command Output’ tab will show the output from the device.
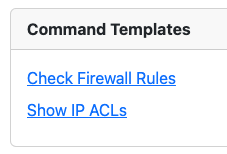
Command Templates Tab

On devices that have Command Templates associated, this tab will show a list of one or more Command Templates names. The name, and the associated description hover-over text, should explain what the command can be used for.
Once you click on the name, the form with the associated input fields will be showing.
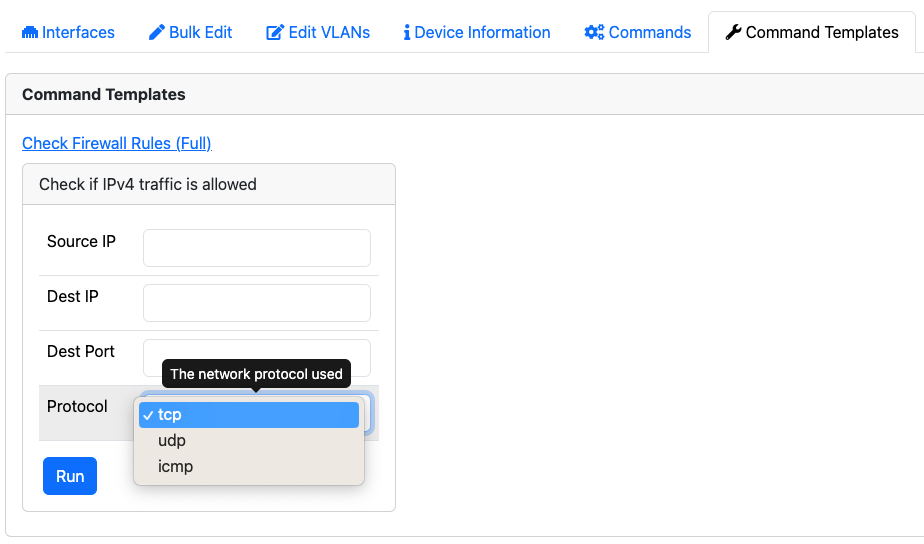
Once the user fills in the form, and clicks Run, the data will be validated according the any regular expression set. If all matches, the command will run on the device.
When complete, the page will refresh and a new ‘Command Output’ tab will show the output from the device.
Warnings/Errors Tab
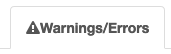
This tab will only show if warnings or errors were found at some point.
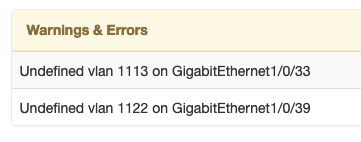
The content of this tab will show a variety of warnings and non-critical errors discovered. Note that these findings are also logged.